Tutorial Chapter 5 — Labels & Inputs
The chapter 5 tutorial has been updated to reflect some of the newer features in CAN Create.
Please download the updated files below:
If any of the images do not map correctly you can import the included chap_5.CIP (image pack) file which will restore the library locations.
The new tutorial files add the CLEAR object to erase the region on the screen down to the background for each of the level BITMAP elements. Earlier versions of the software used a second bitmap with the background region that would overwrite the fill. The CLEAR object eliminates the need for this reducing the number of bitmaps required.
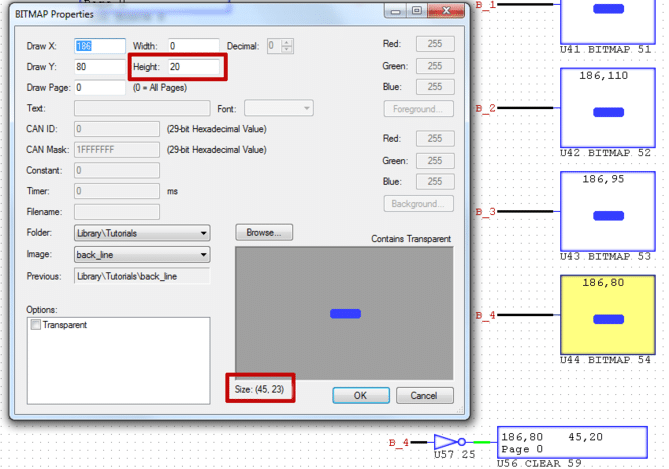
Another feature added was the internal scaling which can be applied to any imported image. In the screenshot above the native image size is 45×23 pixels. The Height at the top of the properties window was modified to 20 which would scale the actual displayed height down and allow the elements to stack in the existing locations without clipping. Both height and width can be scaled locally for each element. A value of 0 would represent native image size. Some image distortion may occur when using the scaling properties particularly if the source image is very small or for photo-real type images.